Before you choose
School hairstyle ideas for busy mornings
School mornings need hairstyles that look cute, feel comfortable, and stay secure without taking too much time. This guide starts with the photos first, so you can quickly compare braids, ponytails, buns, and half-up ideas before opening the styling notes. For days with PE, recess, or windy walks, braids are usually the safest place to start, so our braided hairstyle ideas are the closest next guide after this one.
The visual reference
29+ Easy School Hairstyles for Busy Mornings
Choose braids or bubble styles when the school day includes PE, recess, or outdoor activity.
Idea 01
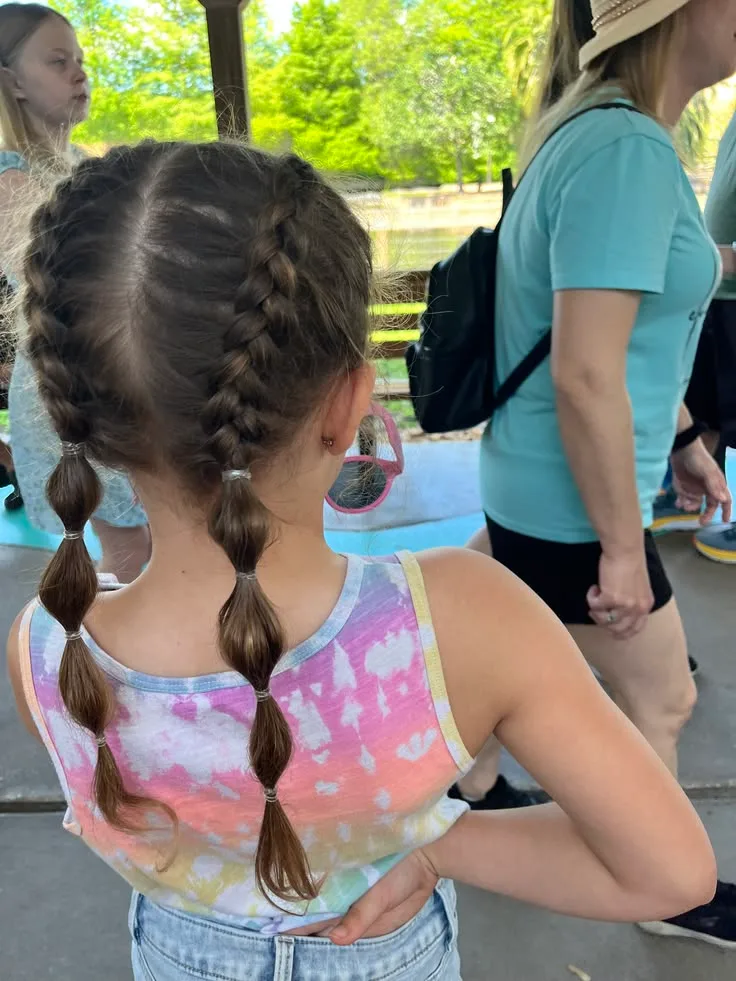
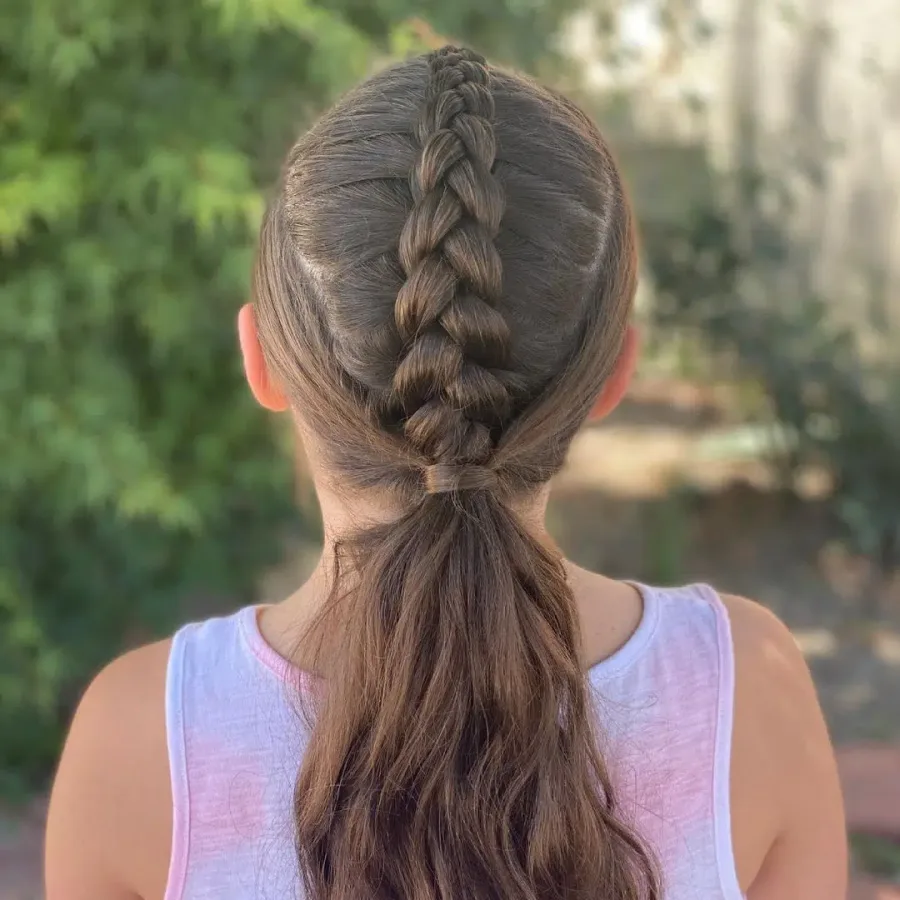
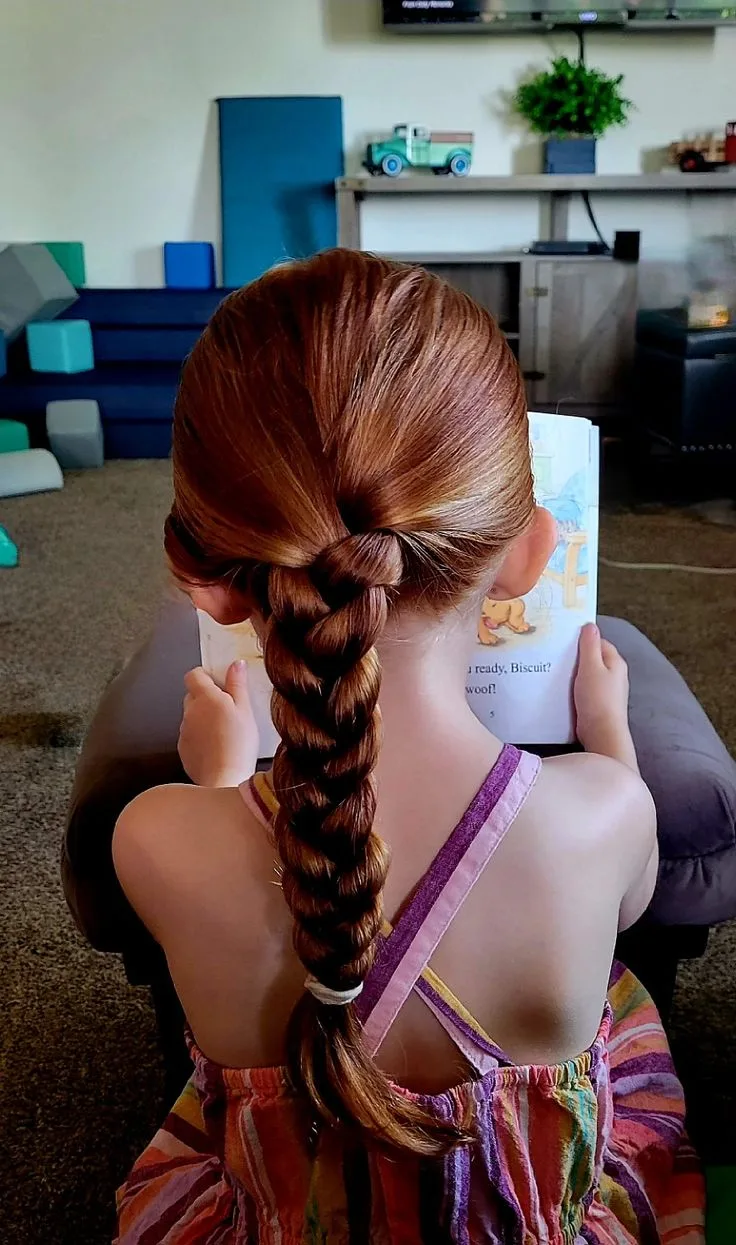
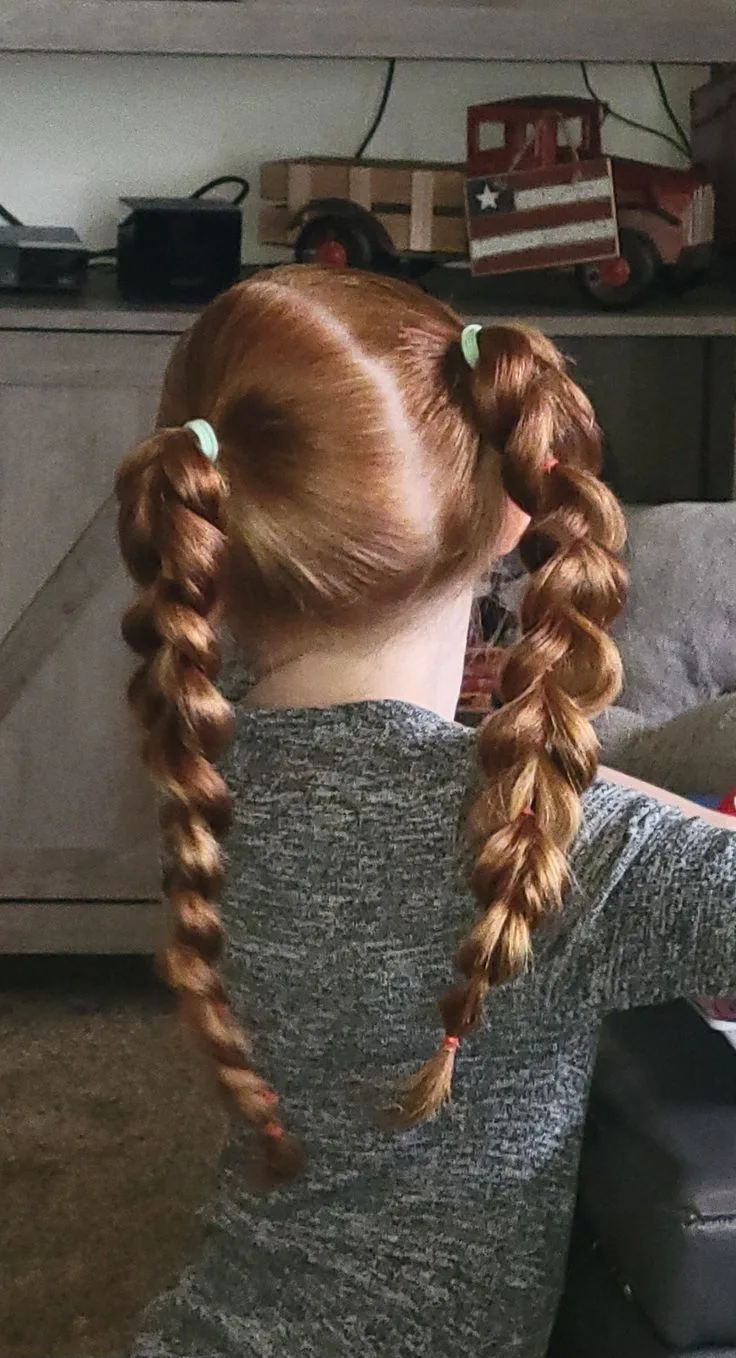
Double Braids for Active School Days
Double braids are reliable for PE, recess, and after-school sports.
- Style
- Braid
- Texture
- Straight
- Parting
- Center
They keep both sides of the hair controlled and reduce tangles by the end of the day. The even split prevents one heavy braid from swinging or loosening. Medium to long hair, active kids, and warm school days. In the photograph, Double Braids for Active School Days keeps its dutch braid pattern readable beside the center part, which is the useful relationship to compare within school hairstyles. Double Braids for Active School Days provides the specific example here: the straight texture is also visible enough to discuss without assuming that the same finish will behave identically on every density.
Wearability note: Add a little leave-in conditioner before braiding so the hair stays smooth without getting stiff.

Idea 02
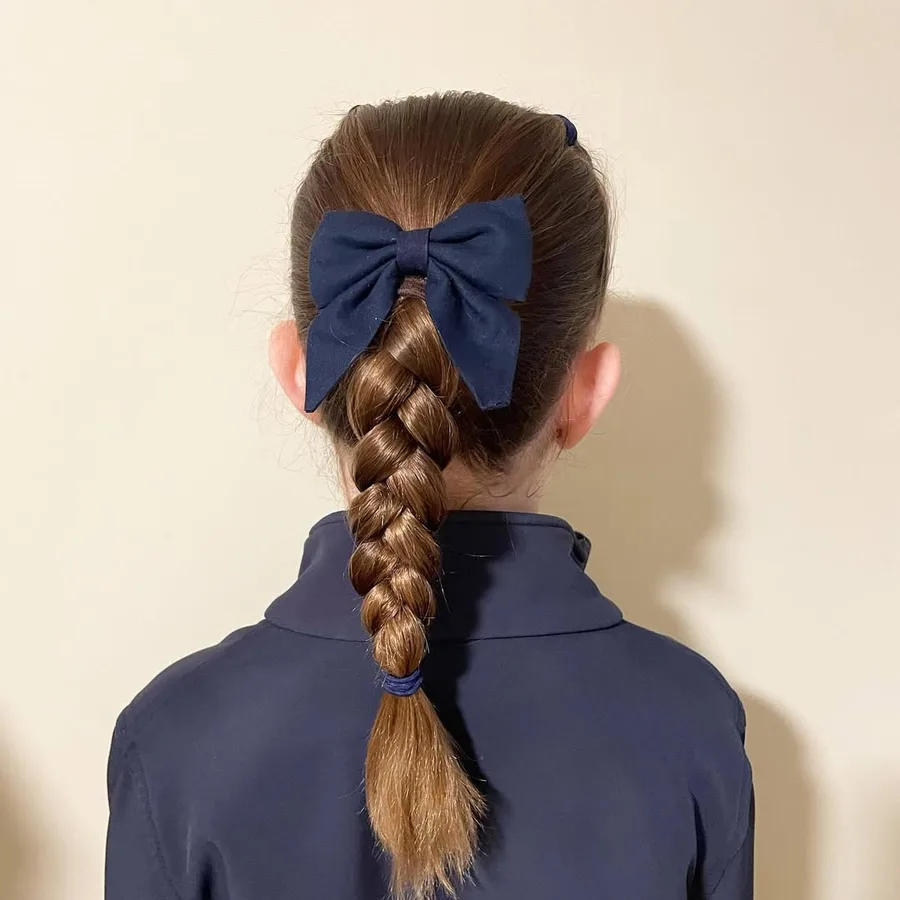
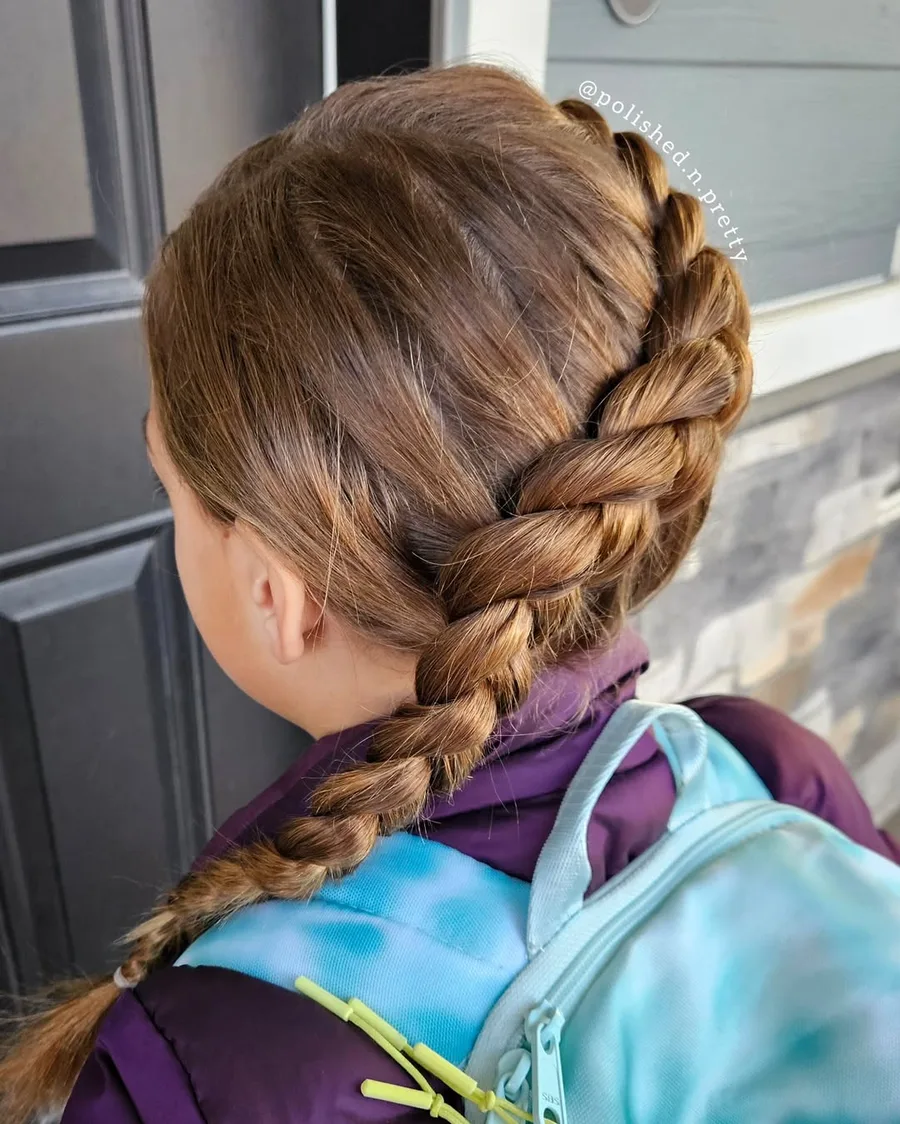
Loose Dutch Braid
A loose Dutch braid gives long hair a raised, textured look while still keeping it contained.
- Style
- Braid
- Texture
- Straight
- Finish
- Sleek
It feels casual enough for everyday school wear. The braid has enough structure to last, but the relaxed finish keeps it soft. Long hair, braided hair routines, and kids who want a less polished braid. The photo is most useful as a reference for long length, braided texture, polished finish, while the final amount of polish can be adjusted to suit an everyday routine.
Wearability note: Pancake the braid gently after tying the end, then set it with a light spray if needed.
Idea 03
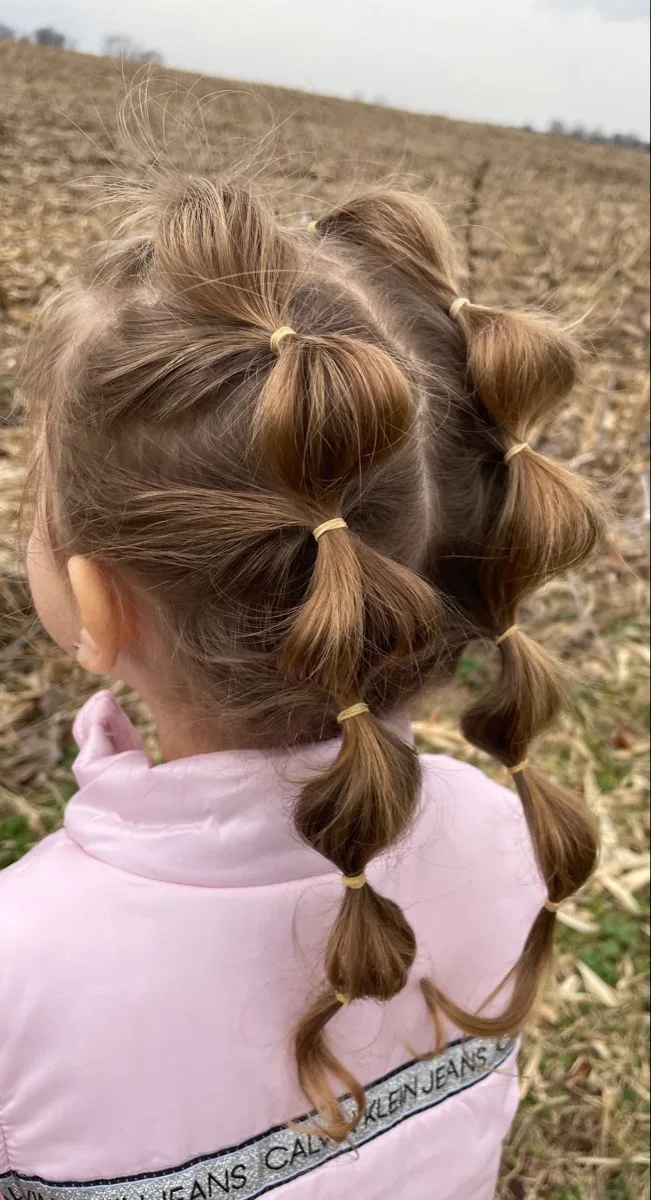
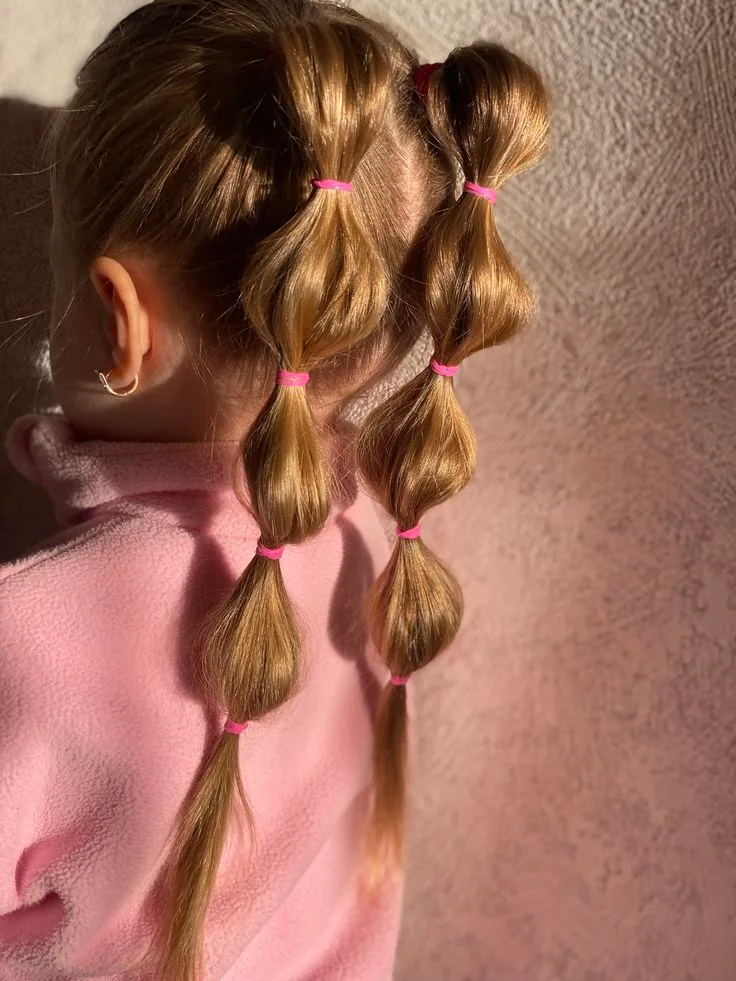
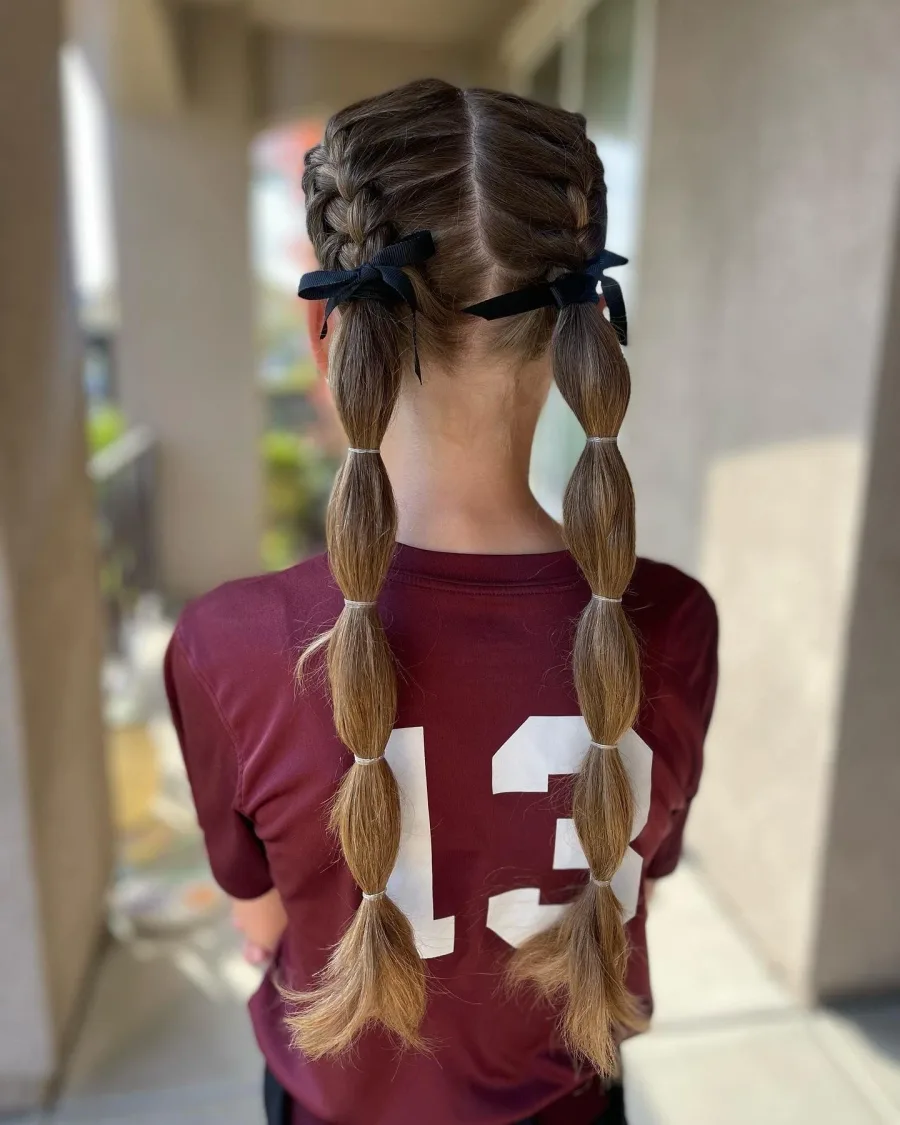
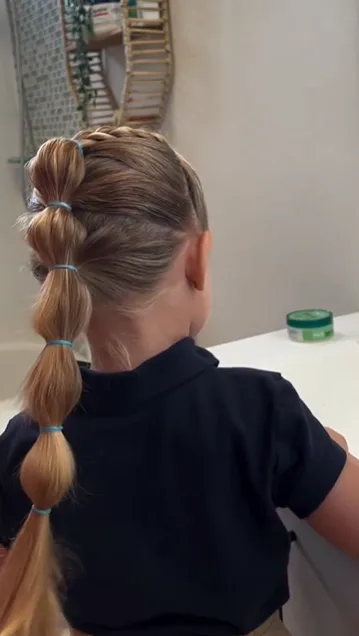
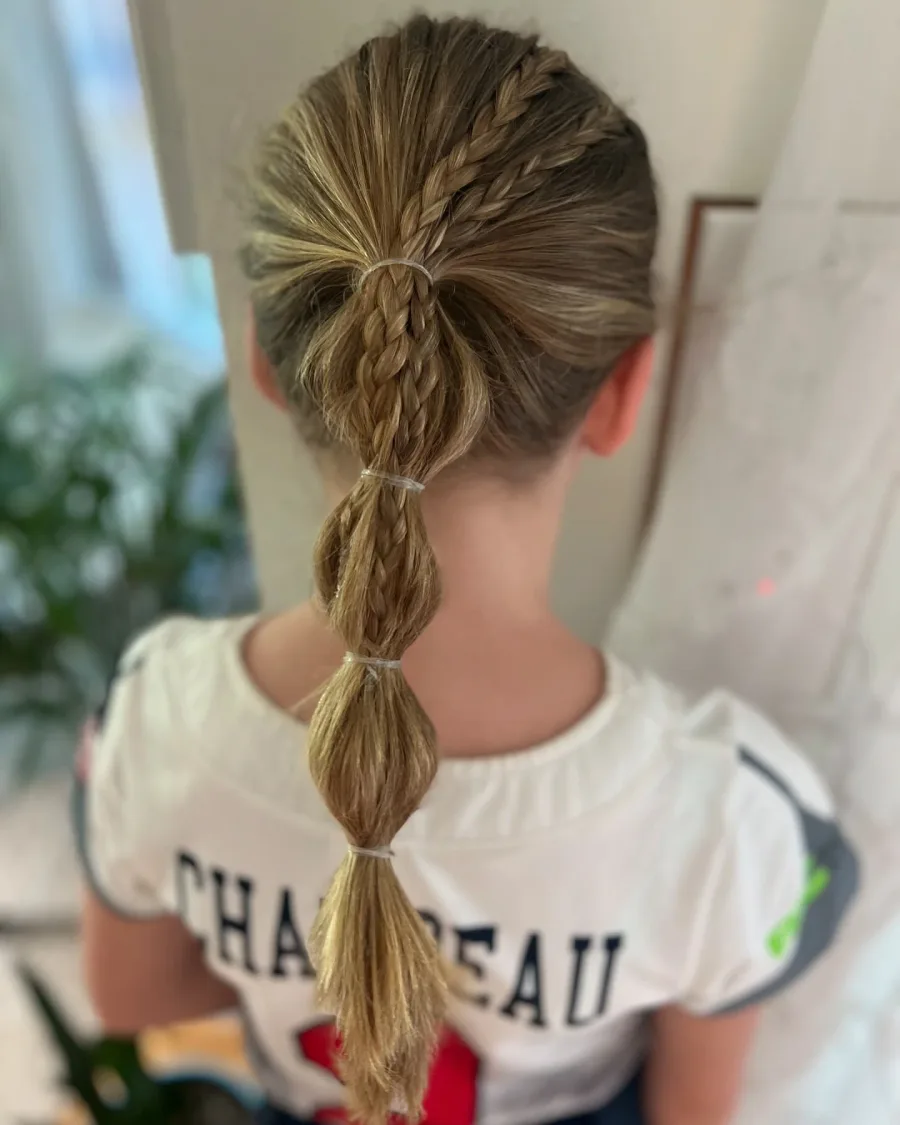
Stacked Bubble Pigtails For School Hairstyles
Stacked bubble pigtails create a fun shape and keep long hair separated into easy sections.
- Style
- Braid
- Texture
- Straight
- Finish
- Sleek
The style is practical for school because it does not rely on heat. Multiple elastics keep the length from matting together during the day. Long straight hair, thick hair, and playful school outfits. What separates Stacked Bubble Pigtails For School Hairstyles from nearby school hairstyles options is the balance between the french braid pattern, center part, and sleek finish. Stacked Bubble Pigtails For School Hairstyles provides the specific example here: those visible proportions can be carried into a consultation even when the final texture or color will be different.
Wearability note: Use the same elastic size throughout so each bubble looks balanced.
Choose your direction
Fastest option
Low ponytails, bubble ponytails, and simple buns.
Most secure option
Double braids, Dutch braids, and braided ponytails.
Best for picture day
Bow ponytails, half-up braids, and soft side braids.
Best for active days
Sporty pigtail braids, bubble pigtails, and game-day braids.
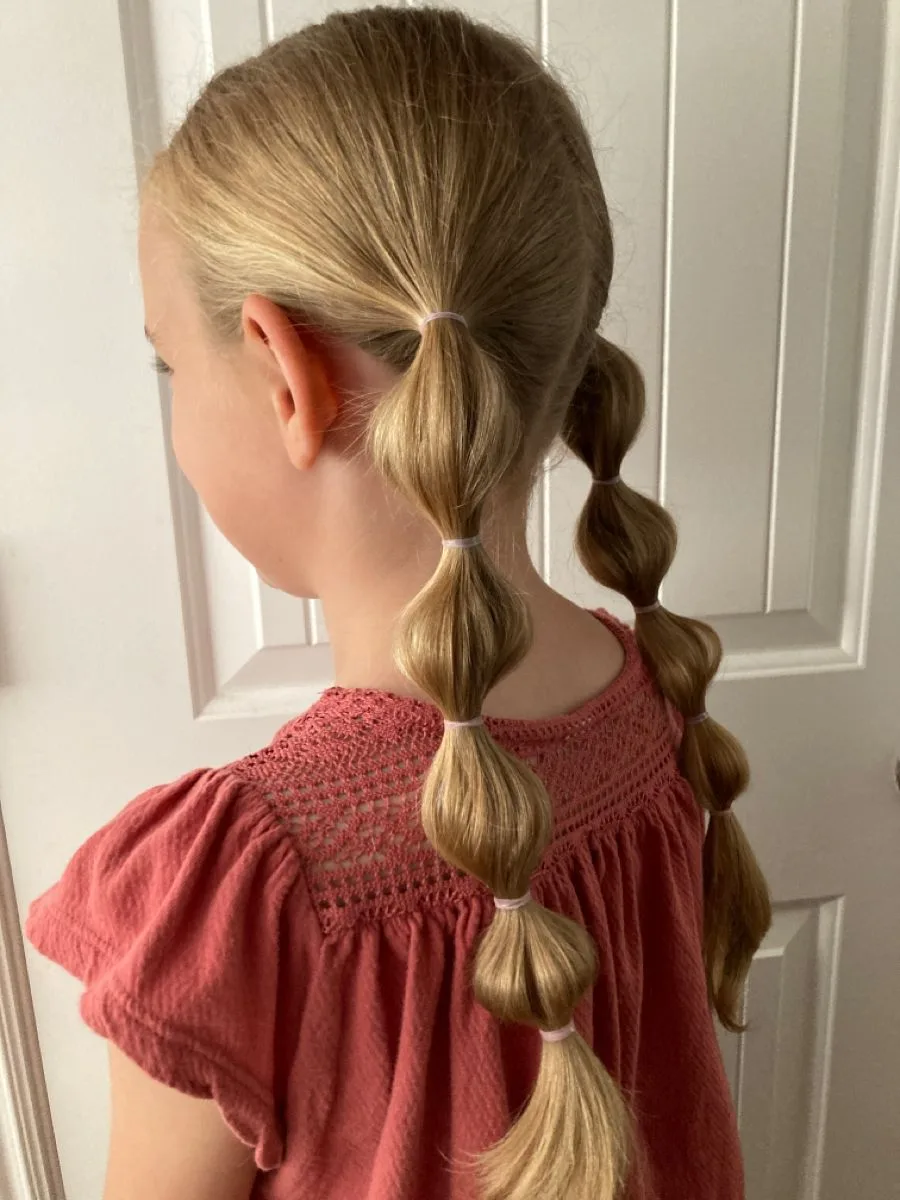
Idea 04
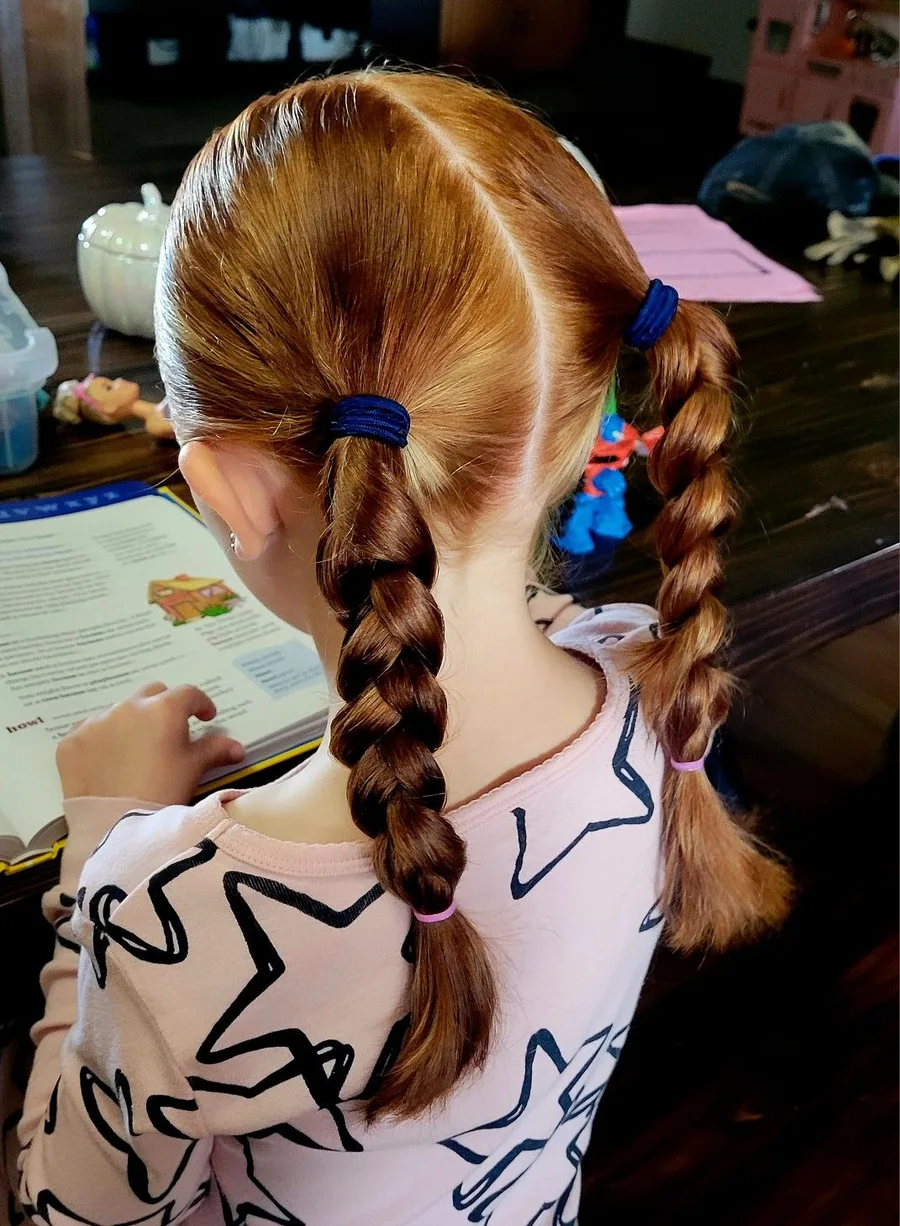
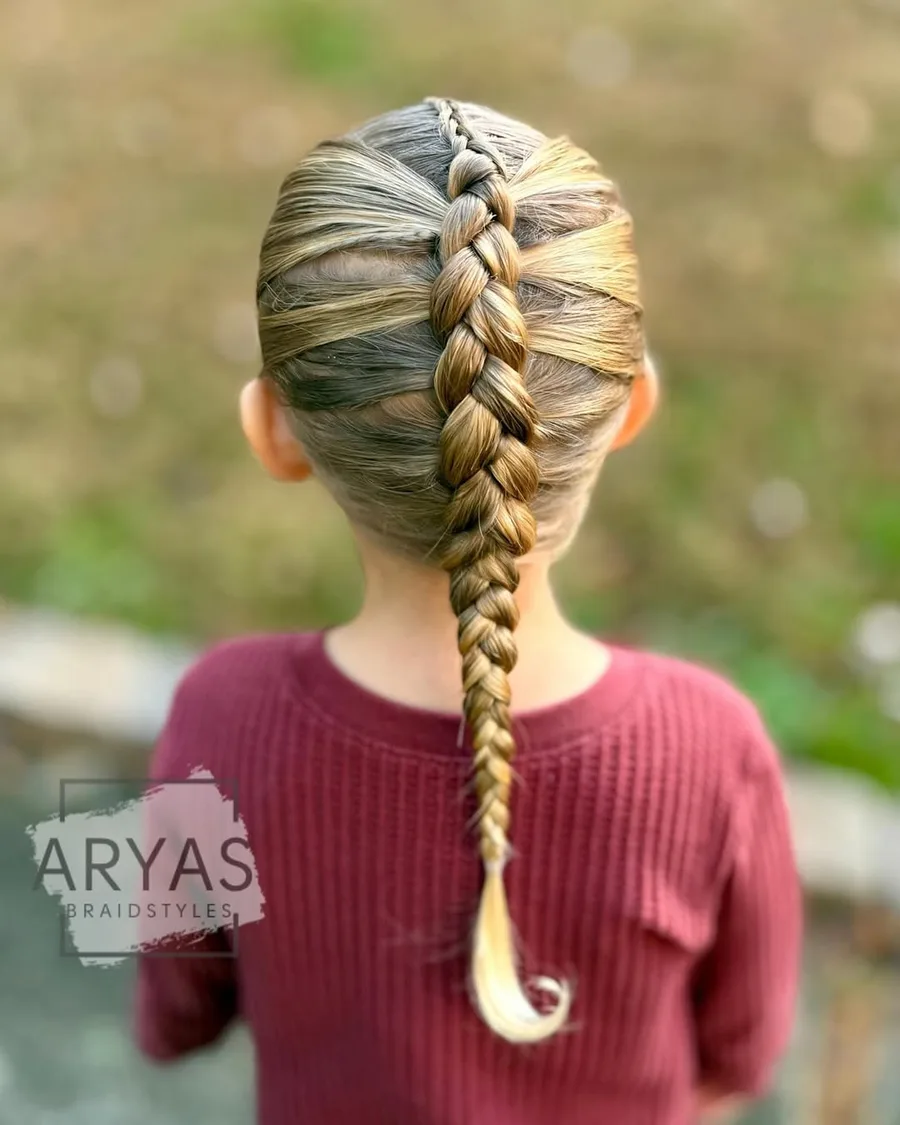
Sporty Braided Pigtails
Sporty braided pigtails are perfect when the school day includes running, games, or practice.
- Style
- Braid
- Texture
- Straight
- Finish
- Sleek
The braids stay close and keep the hair away from the neck. The style is secure without needing pins that can fall out during activity. Long hair, sports uniforms, field days, and outdoor school events. The photographed braids braid makes the french braid pattern easy to locate before the eye moves to the center part. That order is helpful when deciding which part of this school hairstyles idea should remain strongest after it is adapted.
Wearability note: Use a smoothing brush at the crown and tie the ends with strong snag-free elastics.
Idea 05
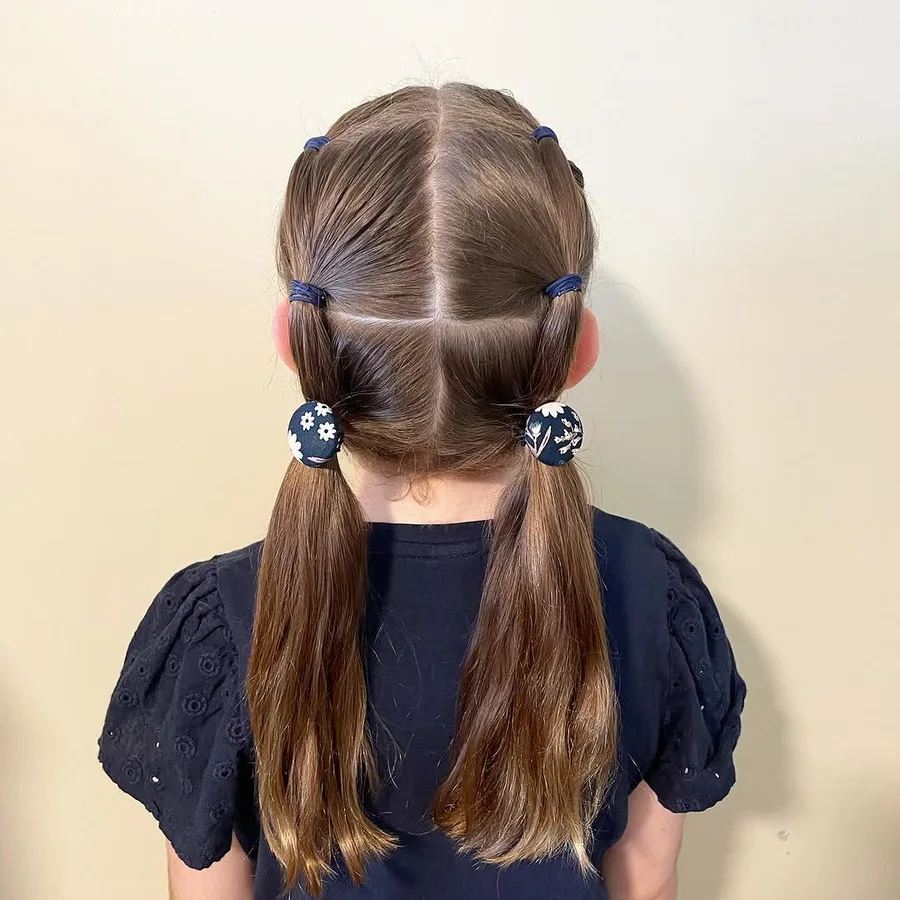
Low Pull-Through Pigtails
Low pull-through pigtails look like soft braids but are made with ponytail sections.
- Style
- Braid
- Texture
- Straight
- Finish
- Sleek
They are easier for beginners than traditional braiding. The repeated sections create hold and shape even if the hair is slippery. Long hair, straight hair, and parents who want a braid-like style without complex technique. A stylist can adapt the color, but the long length, straight texture, soft finish should be discussed because they control how this shape behaves away from the camera.
Wearability note: Keep each section small and gently tug the sides for a fuller look.
Idea 06
Simple School French Braid
A simple French braid starts near the crown and keeps the top layers tucked in.
- Style
- Braid
- Texture
- Straight
- Finish
- Sleek
It is a strong everyday option for students with long hair. The braid catches shorter front pieces, so the style stays neater than a regular low braid. Long hair, layered hair, and school days when hair needs to stay controlled. Viewed as a school hairstyles reference, Simple School French Braid is most informative around the french braid pattern. Simple School French Braid provides the specific example here: the center part and sleek finish explain why the finished silhouette reads this way and which details would need deliberate styling at home.
Wearability note: Braid with steady tension and use a small amount of smoothing cream only on frizzy areas.
Idea 07
Classic Center Braid
A classic center braid is quick, tidy, and easy to match with any school outfit.
- Style
- Braid
- Texture
- Straight
- Finish
- Sleek
It is the style to use when there is little time but the hair needs to look done. The single braid protects the length and keeps it from tangling around backpack straps. Long hair, medium density hair, and everyday classroom routines. The visual evidence in Classic Center Braid is concentrated in the french braid pattern and center part. Together they control how the sleek finish reads, giving this school hairstyles example a specific shape that can be compared with the rest of the gallery.
Wearability note: Brush from ends to roots before braiding and tie the end with a soft elastic.
Idea 08
Bubble Ponytail with Soft Sections
A bubble ponytail gives long hair a cheerful shape without needing braiding skills.
- Style
- Ponytail
- Texture
- Straight
- Finish
- Sleek
The soft sections make the ponytail look fuller and more secure. It adds grip along the length, so the style holds better than one loose ponytail. Long straight hair, fine hair, and school mornings when braids take too long. The overall outline, front detail, and finish give bubble ponytail with soft sections its own silhouette within school hairstyles.
Wearability note: Space the elastics evenly and loosen each bubble just a little for volume.
Idea 09
Long Game-Day Braid
A long game-day braid keeps hair secure during busy school activities while still showing off length.
- Style
- Braid
- Texture
- Straight
- Finish
- Sleek
It is simple, sporty, and easy to pair with uniforms. The braid prevents long hair from swinging into the face during movement. Very long hair, sports days, and students who need a secure all-day style. For Long Game-Day Braid, the french braid pattern remains the clearest fixed point in the photograph. Compare its scale with the center part and sleek finish; those relationships reveal how this school hairstyles option is constructed and how much daily definition it may need.
Wearability note: Use leave-in conditioner before braiding and add an extra elastic if the ends are very long.
Idea 10
Bright Accent Braids
Bright accent braids add color and personality while keeping long hair managed.
- Style
- Braid
- Texture
- Straight
- Finish
- Sleek
The style is useful when a child wants something fun but still school-safe. Small color accents make the style feel special without changing the basic braided structure. Long hair, spirit week, casual Fridays, and kids who like colorful details. Bright Accent Braids makes the french braid pattern, center part, and sleek finish visible in the same frame. Their spacing gives a more reliable basis for choosing this school hairstyles direction than copying the model's color or assuming the finish will transfer unchanged.
Wearability note: Use color-safe elastics or clip-in accents that can be removed easily after school.
Idea 11
Braided Ponytail for Older Students
This braided ponytail looks polished enough for older students but still practical for class.
- Style
- Bubble Pigtails
- Texture
- Straight
- Finish
- Sleek
It keeps the sides sleek and lets the braid carry the length. The ponytail base gives lift while the braid keeps the ends controlled. Teen students, long hair, protective styling, and days with after-school plans. A stylist can adapt the color, but the long length, braided texture, sleek finish should be discussed because they control how this shape behaves away from the camera.
Wearability note: Smooth the base first, braid the ponytail, and finish the ends with a small elastic.
Idea 12
Simple Double Braids with Backpack-Friendly Length
These double braids keep the length divided so it does not bunch under backpack straps.
- Style
- Braid
- Texture
- Straight
- Finish
- Sleek
The style is straightforward and dependable for daily school wear. Two braids reduce friction and make detangling easier later. Long hair, thick hair, and younger students who are active between classes. Within this school hairstyles gallery, Simple Double Braids with Backpack-Friendly Length earns its place through the visible connection between french braid pattern and center part. Simple Double Braids with Backpack-Friendly Length provides the specific example here: the sleek finish adds context, but the structural relationship between the first two details is what defines the option.
Wearability note: Part cleanly down the center and braid each side to the same length.
Idea 13
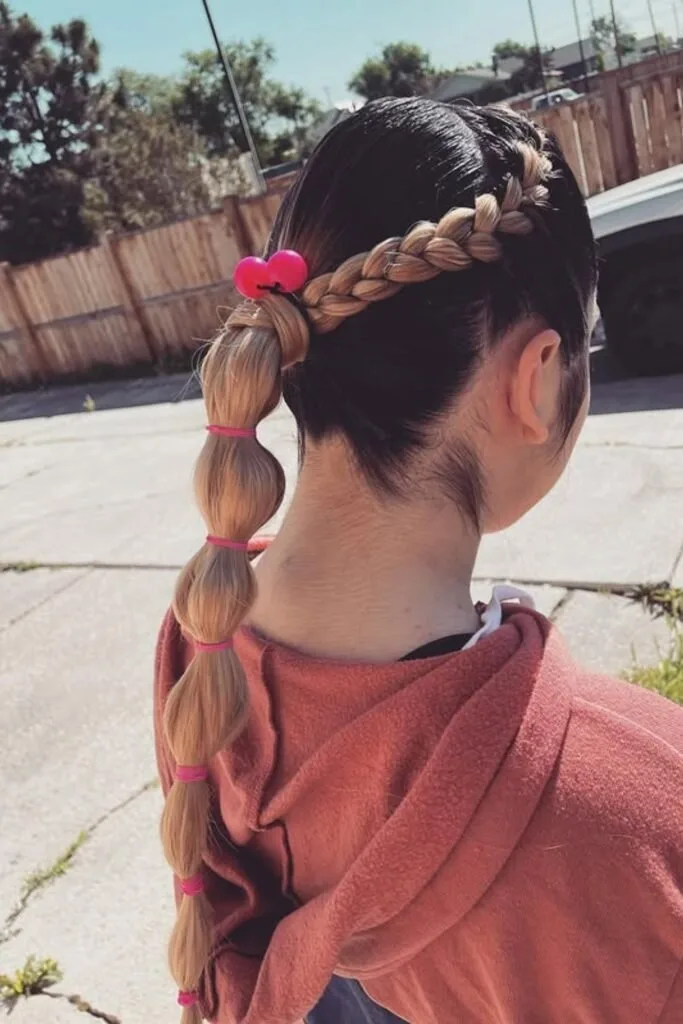
Side Bubble Braid
A side bubble braid brings the hair forward slightly while still keeping it tied.
- Style
- Braid
- Texture
- Straight
- Finish
- Sleek
It is a nice choice for students who like seeing their hairstyle from the front. The side placement feels styled, but the bubble sections are quick and secure. Long hair, straight hair, school photos, and easy decorative styling. In side bubble braid, the parting, braid direction, and hanging length are the clearest details to compare before choosing a direction.
Wearability note: Use small elastics and gently fluff each bubble after the full braid is secured.
Idea 14
Twin Pull-Through Braids
Twin pull-through braids create a bold school hairstyle without requiring advanced braiding.
- Style
- Braid
- Texture
- Straight
- Finish
- Sleek
The sections hold well and look full from the back. The elastic structure gives the style grip, which helps it last through active school days. Long hair, thick hair, sports days, and students who like a statement braid. The photo is most useful as a reference for long length, braided texture, while the final amount of polish can be adjusted to suit an everyday routine.
Wearability note: Use several soft elastics and loosen the sections evenly so the braids do not feel tight.
Idea 15
Side Dutch Braid for School
A side Dutch braid keeps hair tidy while adding a visible braid detail.
- Style
- Braid
- Texture
- Straight
- Finish
- Sleek
It works well with casual clothes, school uniforms, and outdoor activities. The raised braid holds the front layers firmly and keeps the length directed to one side. Medium to long hair, straight hair, and students who want a style that looks neat from every angle. What separates Side Dutch Braid for School from nearby school hairstyles options is the balance between the french braid pattern, center part, and sleek finish. Side Dutch Braid for School provides the specific example here: those visible proportions can be carried into a consultation even when the final texture or color will be different.
Wearability note: Start with detangled hair, braid close to the scalp, and secure the end with a small elastic.
Idea 16
Low Bubble Ponytail
A low bubble ponytail is comfortable, quick, and easy to wear with school collars or hoodies.
- Style
- Braid
- Texture
- Straight
- Finish
- Sleek
It controls the hair without pulling high on the scalp. The low base keeps tension gentle while the bubble sections stop the ponytail from loosening. Long straight hair, fine hair, and students who prefer low-tension hairstyles. Use low bubble ponytail to decide how much emphasis you want on the overall outline, front detail, and finish.
Wearability note: Use a smoothing brush at the base and keep the elastics loose enough for comfort.
Idea 17
Everyday Side Braid
An everyday side braid is easy to do before school and easy to undo after.
- Style
- Braid
- Texture
- Straight
- Finish
- Sleek
It keeps long hair controlled while giving the style a softer shape than a center braid. The side braid is practical but still visible, so it feels more styled than a basic ponytail. Long hair, medium density hair, and students who like simple braided looks. The photograph of everyday side braid keeps the parting, braid direction, and hanging length visible enough for a useful salon conversation.
Wearability note: Pull the braid over one shoulder, braid loosely, and secure the end before gently smoothing flyaways.
Idea 18
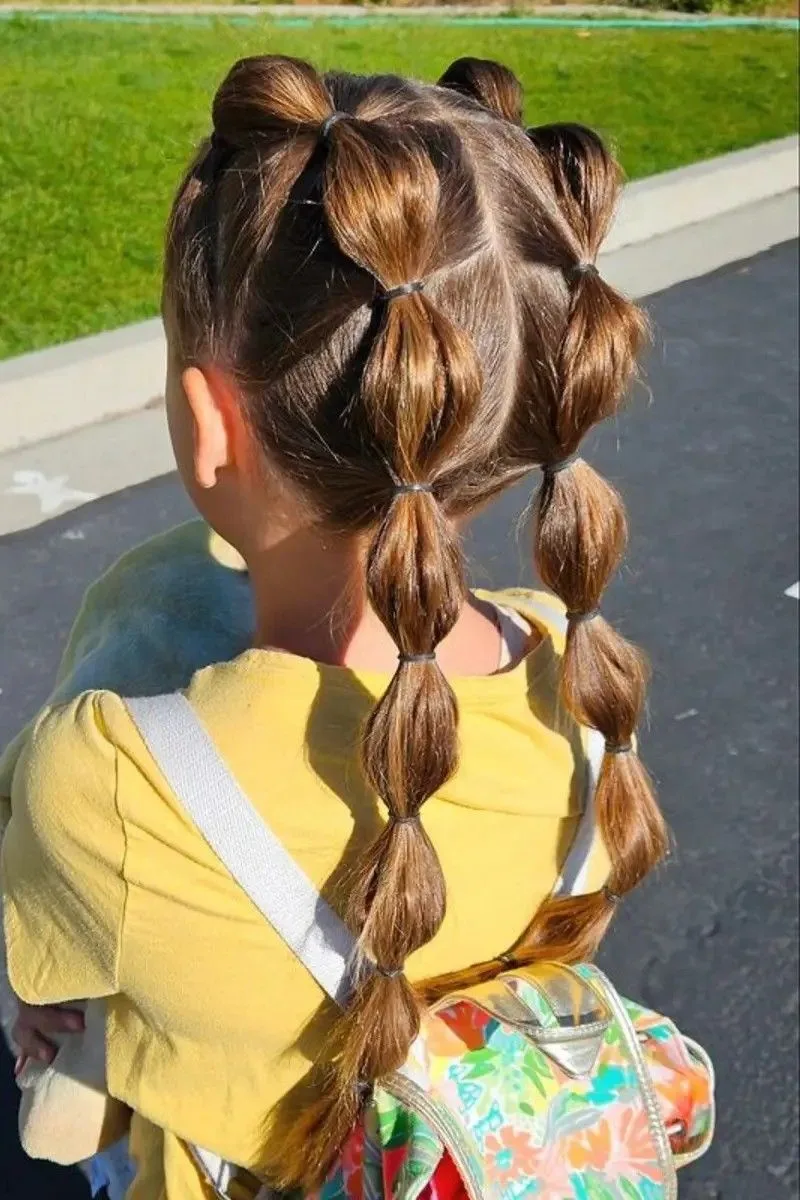
Playground-Ready Bubble Ponytail For School Hairstyles
This bubble ponytail is built for movement.
- Style
- Braid
- Texture
- Straight
- Finish
- Sleek
The sections keep the hair from whipping around while still looking cute and easygoing. The repeated ties give long hair multiple hold points, which is helpful for recess and PE. Long hair, active kids, and warm-weather school days. What distinguishes playground-ready bubble ponytail for school hairstyles is the balance between the overall outline, front detail, and finish.
Wearability note: Keep a few spare elastics in the backpack in case one section needs a quick refresh.

Idea 19
Colorful Braided Ponytail
A colorful braided ponytail adds a fun detail while keeping the hair secure.
- Style
- Braid
- Texture
- Straight
- Finish
- Sleek
It is a good school hairstyle when the outfit is simple but the hair can be playful. The braid holds the hair in place and the color accents make it memorable. Long hair, school events, and kids who like bright accessories. The visual evidence in Colorful Braided Ponytail is concentrated in the french braid pattern and center part. Colorful Braided Ponytail provides the specific example here: together they control how the sleek finish reads, giving this school hairstyles example a specific shape that can be compared with the rest of the gallery.
Wearability note: Use lightweight accents and avoid heavy clips that can pull the braid down.
Idea 20
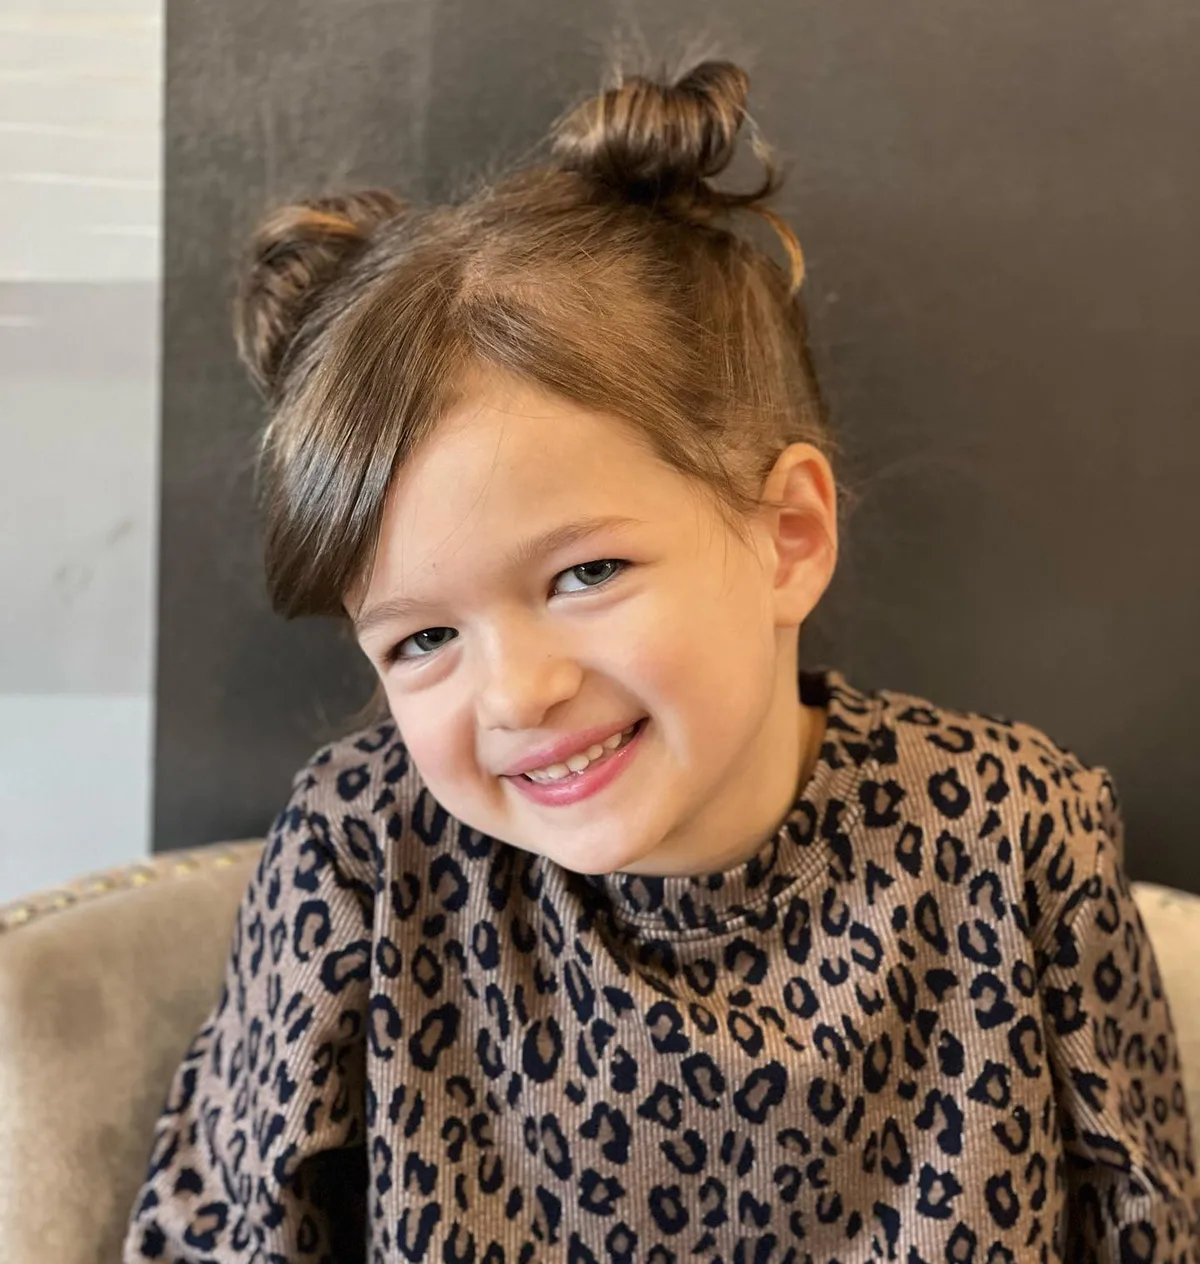
Brunette Straight Bun
The center part gives Brunette Straight Bun a distinct outline within this gallery.
- Style
- Bun
- Texture
- Straight
- Finish
- Sleek
sleek finish connects the visible shape to the straight texture instead of leaving the sections visually separate. Compare that transition when deciding whether this version of school hairstyles suits the result you have in mind. Brunette Straight Bun presents center part without obscuring the sleek finish, while the straight texture completes the visible outline. That combination is the practical reason to keep this photograph among the school hairstyles references.
Wearability note: Have your stylist adapt the spacing around the sleek finish while preserving the visible relationship between the visible shape and straight texture.
Idea 21
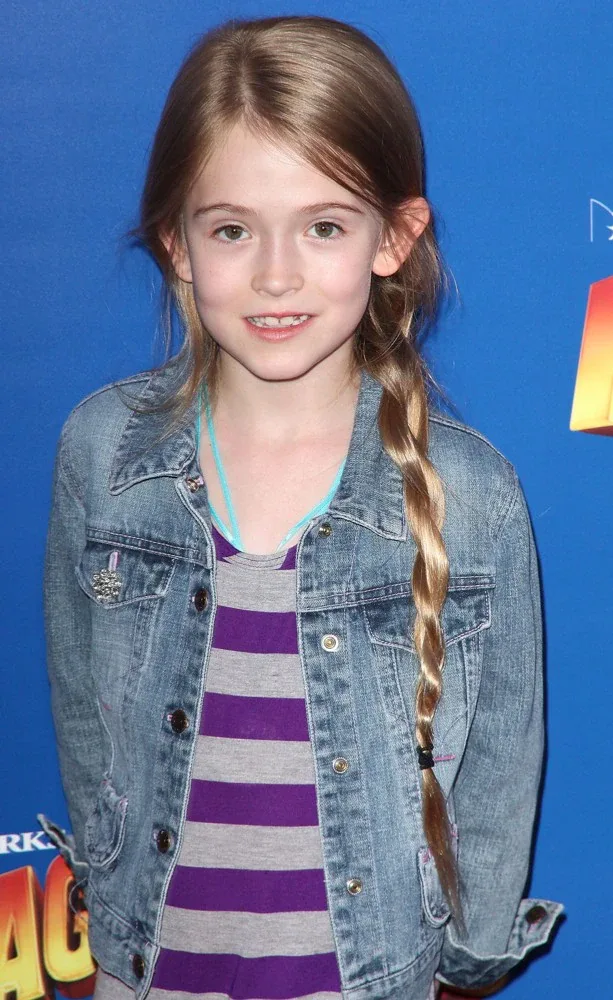
Brunette Straight Braid
Brunette Straight Braid uses french braid to make the visible shape the strongest visual detail.
- Style
- Braid
- Texture
- Straight
- Finish
- Sleek
The center part remains readable and the sleek finish does not compete with it. This makes the photograph especially helpful for explaining the balance you want from school hairstyles. For Brunette Straight Braid, the french braid pattern remains the clearest fixed point in the photograph. Brunette Straight Braid provides the specific example here: compare its scale with the center part and sleek finish; those relationships reveal how this school hairstyles option is constructed and how much daily definition it may need.
Wearability note: Decide whether the visible shape or the sleek finish should carry more emphasis once the style is adapted to your texture.
Idea 22
Brunette Straight Bun With Brunette Color
In Brunette Straight Bun With Brunette Color, center part leads into sleek finish without hiding the straight texture.
- Style
- Bun
- Texture
- Straight
- Finish
- Sleek
Brunette Straight Bun With Brunette Color provides the specific example here: that progression gives the visible shape a clear beginning and finish. Among the school hairstyles examples, this one is most useful for comparing placement and the amount of visible definition. Brunette Straight Bun With Brunette Color makes the center part, sleek finish, and straight texture visible in the same frame. Brunette Straight Bun With Brunette Color provides the specific example here: their spacing gives a more reliable basis for choosing this school hairstyles direction than copying the model's color or assuming the finish will transfer unchanged.
Wearability note: Check the visible shape from the photographed angle and agree on how firmly the straight texture should be set.
Idea 23
Brunette Straight Bun With Straight Texture
Brunette Straight Bun With Straight Texture is defined by the contrast between center part and sleek finish.
- Style
- Bun
- Texture
- Straight
- Finish
- Sleek
Brunette Straight Bun With Straight Texture provides the specific example here: both details remain visible against the straight texture, making the structure easier to read at a glance. Save this school hairstyles reference if that contrast is the part you want to reproduce. The center part in Brunette Straight Bun With Straight Texture establishes the first line of the silhouette, and the sleek finish carries it toward the straight texture. This is the part of the school hairstyles photograph worth discussing when placement and proportion are the main decision.
Wearability note: Translate the center part to your own length first, then refine the sleek finish without overloading the finish.

Idea 24
Brunette Straight Bun With Shoulder Outline
center part shapes Brunette Straight Bun With Shoulder Outline, while sleek finish keeps the result connected.
- Style
- Bun
- Texture
- Straight
- Finish
- Sleek
The visible shape holds its place without flattening the straight texture. That visible separation gives this school hairstyles idea a specific purpose in the gallery. Within this school hairstyles gallery, Brunette Straight Bun With Shoulder Outline earns its place through the visible connection between center part and sleek finish. Brunette Straight Bun With Shoulder Outline provides the specific example here: the straight texture adds context, but the structural relationship between the first two details is what defines the option.
Wearability note: Use the photograph to settle the position of the visible shape, then choose a finish that leaves the sleek finish visible.
Idea 25
Brunette Straight Bun With Center Part
Brunette Straight Bun With Center Part draws attention to the visible shape through its center part.
- Style
- Bun
- Texture
- Straight
- Finish
- Sleek
The sleek finish stays visible beside the straight texture, so the photograph offers a clear way to compare this option with the other school hairstyles ideas. Brunette Straight Bun With Center Part provides the specific example here: the useful detail is the relationship between those areas, not simply the photographed color. In the photograph, Brunette Straight Bun With Center Part keeps its center part readable beside the sleek finish, which is the useful relationship to compare within school hairstyles. Brunette Straight Bun With Center Part provides the specific example here: the straight texture is also visible enough to discuss without assuming that the same finish will behave identically on every density.
Wearability note: Ask how the visible shape and sleek finish would be adjusted for your own hair before deciding on the final finish.
Idea 26
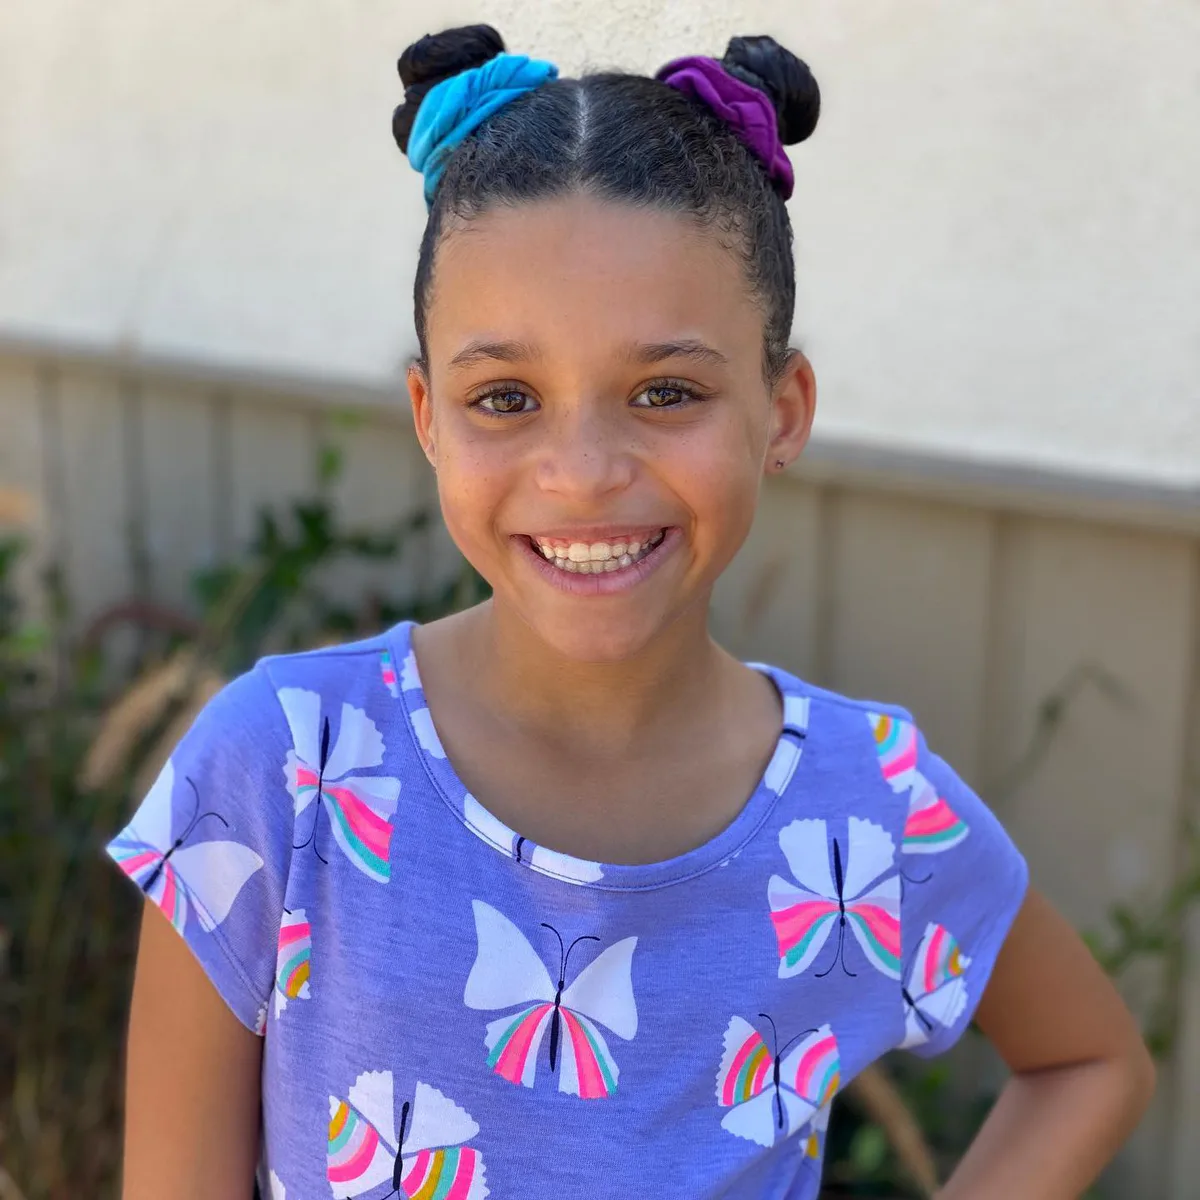
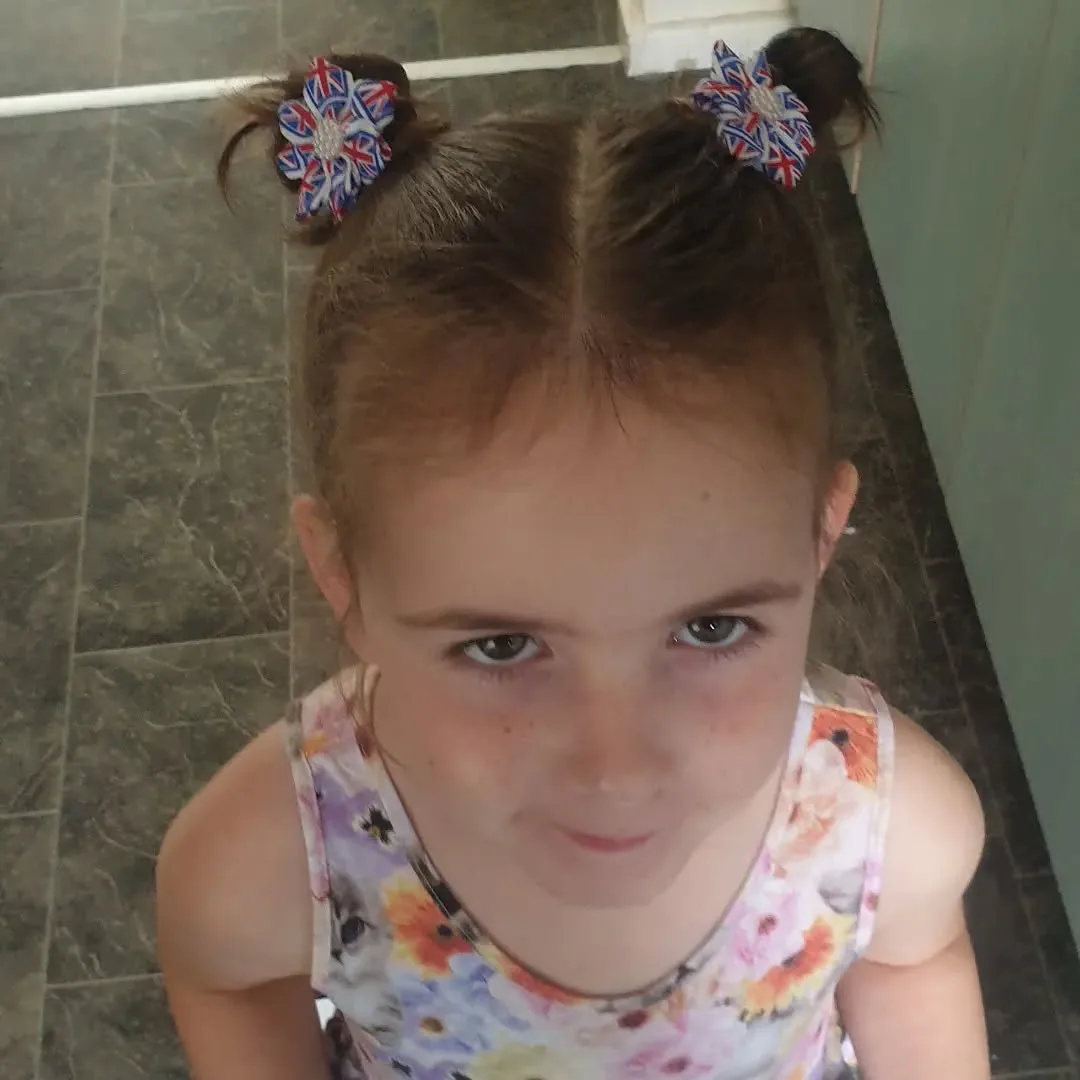
Chestnut Straight Space Buns
Chestnut Straight Space Buns keeps the visible shape clear while sleek finish supports the overall shape.
- Style
- Space Buns
- Texture
- Straight
- Finish
- Sleek
From this angle, center part is easy to see without losing the straight texture. That balance makes the image useful when choosing between softer and more defined school hairstyles. Chestnut Straight Space Buns gives a clear view of the center part and the way it meets the sleek finish. For someone comparing school hairstyles, that transition matters because it affects the outline more directly than the model's exact color or styling product.
Wearability note: Discuss the placement of the visible shape first, then decide how polished or relaxed the straight texture should look in daily wear.
Idea 27
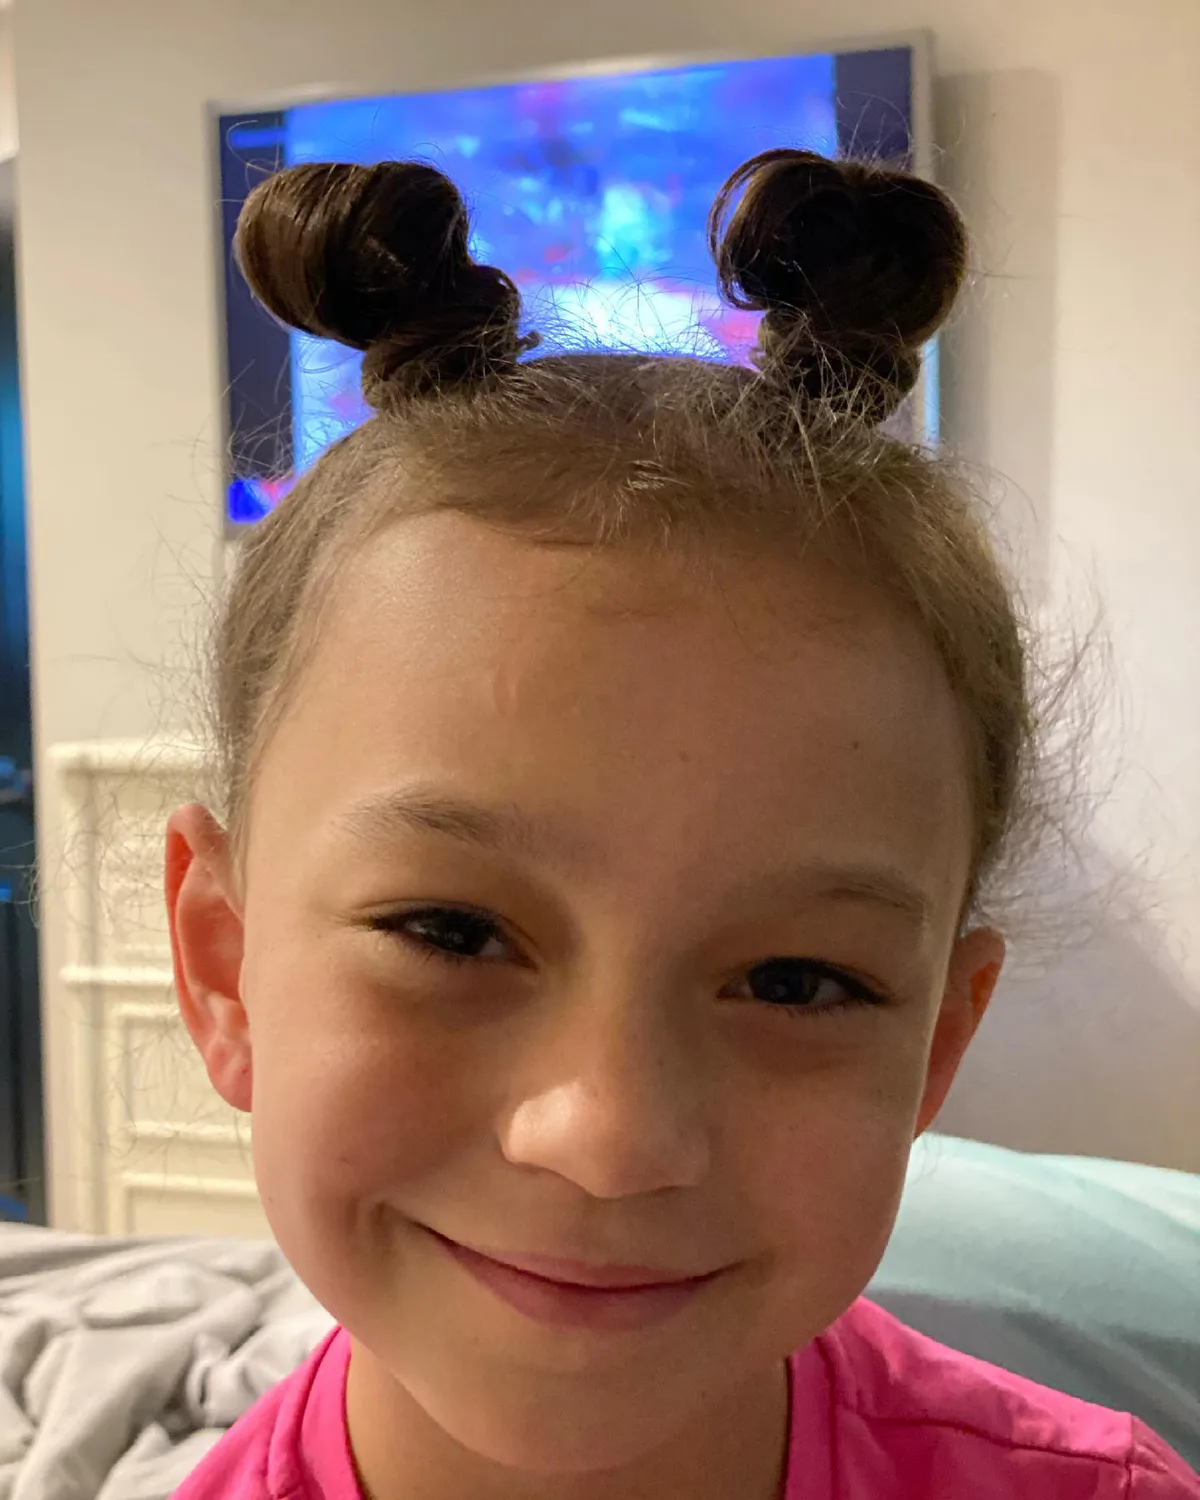
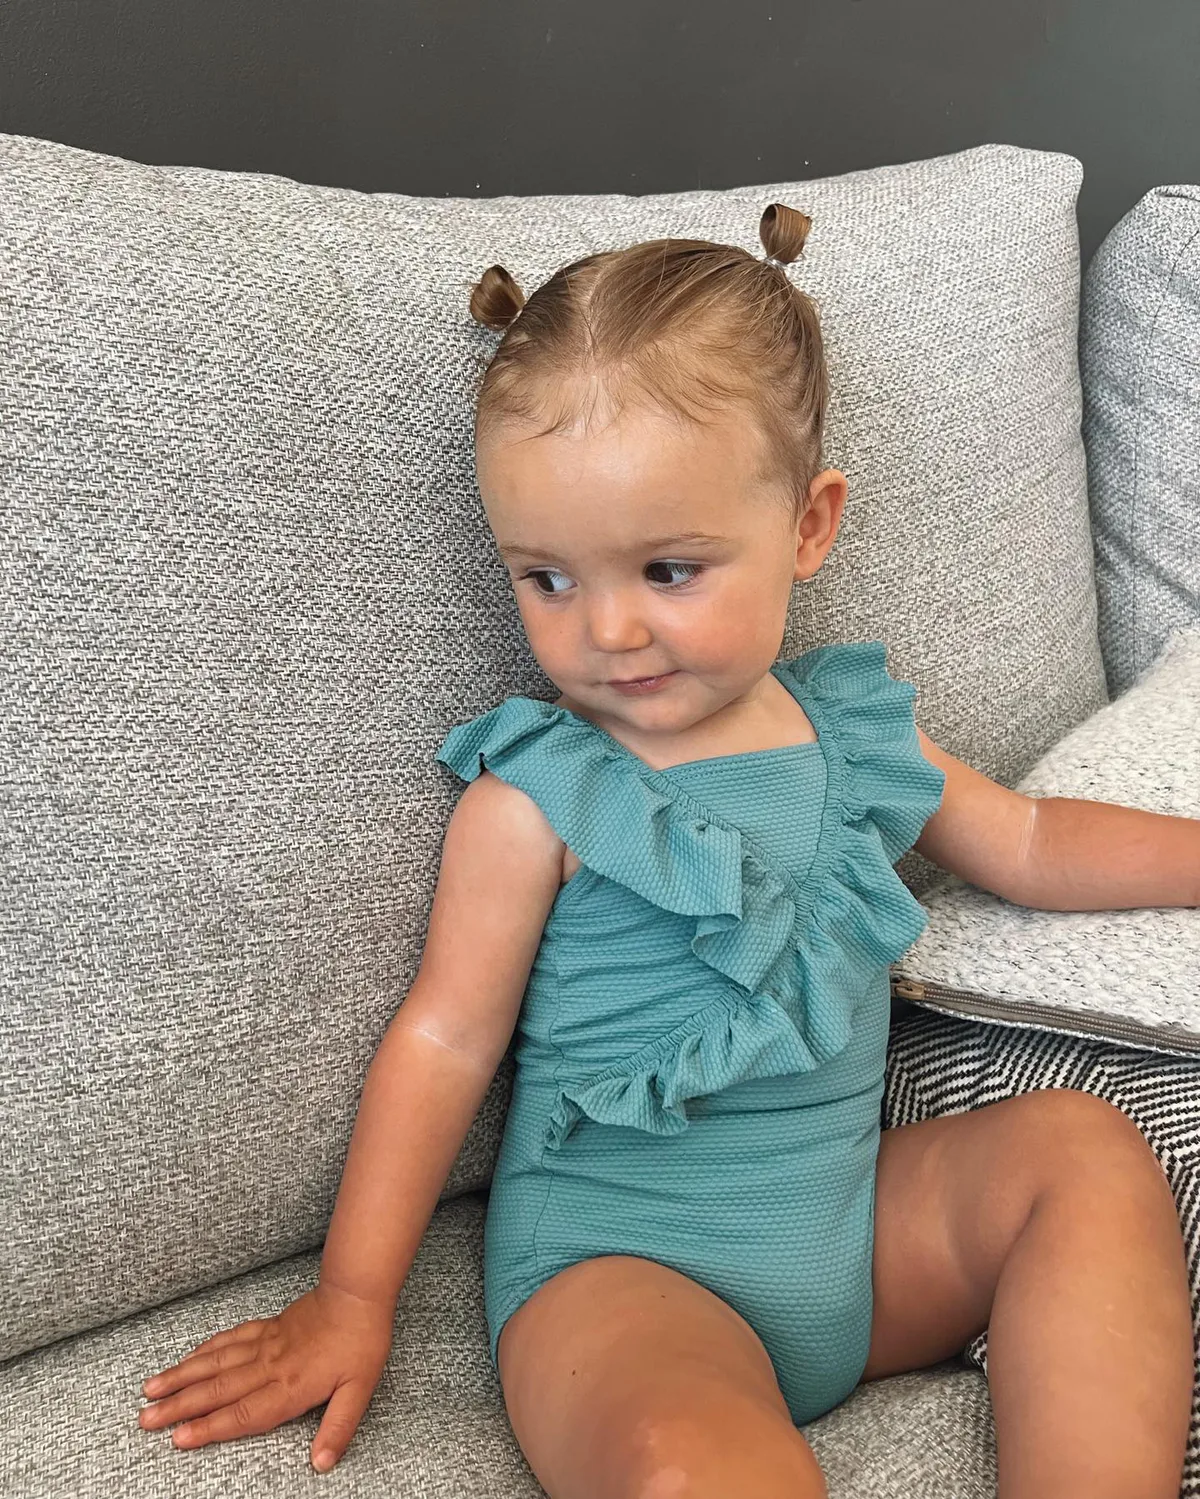
Chestnut Straight Space Buns With Volume Through The Low Volume
Chestnut Straight Space Buns With Volume Through The Low Volume combines center part with a visible sleek finish.
- Style
- Space Buns
- Texture
- Straight
- Finish
- Sleek
The photograph separates the visible shape from the straight texture, which helps clarify where the shape begins and where it releases. It is a practical school hairstyles reference when proportion matters more than matching the model's exact color. What separates Chestnut Straight Space Buns With Volume Through The Low Volume from nearby school hairstyles options is the balance between the center part, sleek finish, and straight texture. Chestnut Straight Space Buns With Volume Through The Low Volume provides the specific example here: those visible proportions can be carried into a consultation even when the final texture or color will be different.
Wearability note: Confirm how much definition the visible shape needs and whether the sleek finish will hold with your normal styling routine.
Idea 28
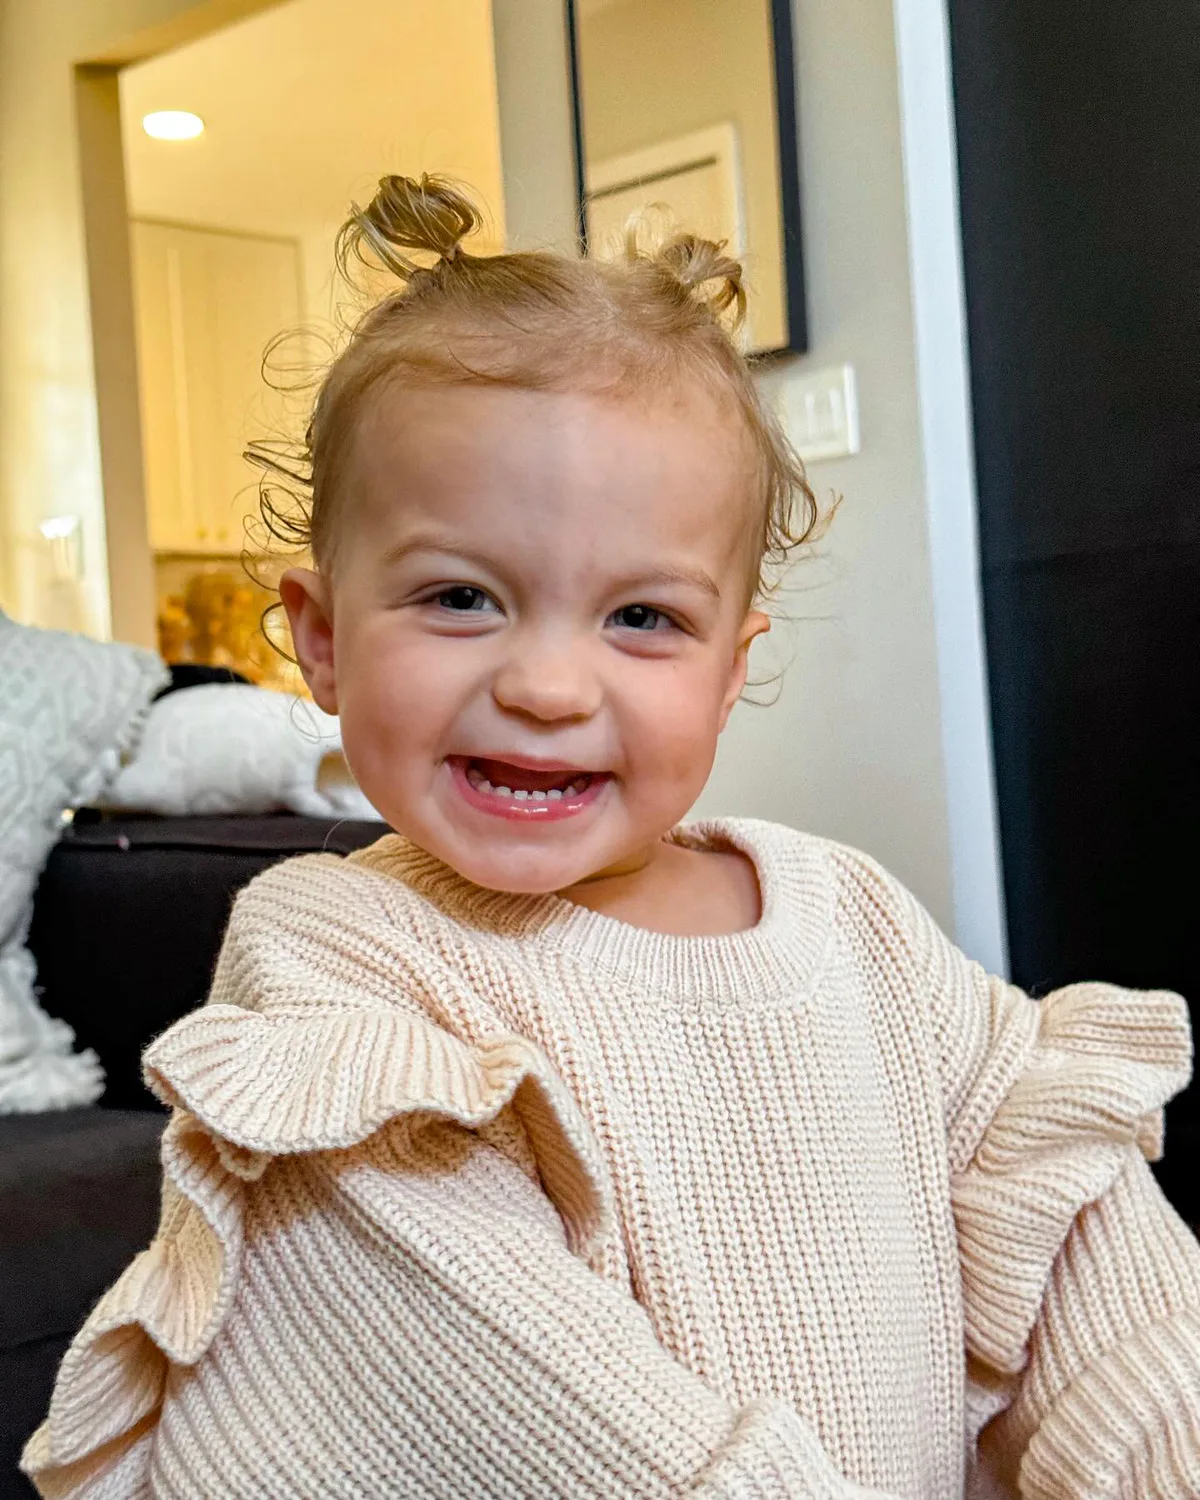
Chestnut Straight Space Buns With Chestnut Color
The center part gives Chestnut Straight Space Buns With Chestnut Color a distinct outline within this gallery.
- Style
- Space Buns
- Texture
- Straight
- Finish
- Sleek
Chestnut Straight Space Buns With Chestnut Color provides the specific example here: sleek finish connects the visible shape to the straight texture instead of leaving the sections visually separate. Chestnut Straight Space Buns With Chestnut Color provides the specific example here: compare that transition when deciding whether this version of school hairstyles suits the result you have in mind. The photographed bun makes the center part easy to locate before the eye moves to the sleek finish. Chestnut Straight Space Buns With Chestnut Color provides the specific example here: that order is helpful when deciding which part of this school hairstyles idea should remain strongest after it is adapted.
Wearability note: Chestnut Straight Space Buns With Chestnut Color provides the specific example here: have your stylist adapt the spacing around the sleek finish while preserving the visible relationship between the visible shape and straight texture. For Chestnut Straight Space Buns With Chestnut Color, this observation applies to the photographed bun.
Idea 29
Chestnut Straight Space Buns With Straight Texture
Chestnut Straight Space Buns With Straight Texture uses center part to make the visible shape the strongest visual detail.
- Style
- Space Buns
- Texture
- Straight
- Finish
- Sleek
The sleek finish remains readable and the straight texture does not compete with it. Chestnut Straight Space Buns With Straight Texture provides the specific example here: this makes the photograph especially helpful for explaining the balance you want from school hairstyles. Chestnut Straight Space Buns With Straight Texture should be judged first by its center part, then by how the sleek finish supports the straight texture. This photograph keeps all three areas visible, so it can guide a precise conversation about school hairstyles rather than only naming a trend.
Wearability note: Decide whether the visible shape or the straight texture should carry more emphasis once the style is adapted to your texture.

Idea 30
Chestnut Straight Space Buns With Shoulder Outline
In Chestnut Straight Space Buns With Shoulder Outline, center part leads into sleek finish without hiding the straight texture.
- Style
- Space Buns
- Texture
- Straight
- Finish
- Sleek
Chestnut Straight Space Buns With Shoulder Outline provides the specific example here: that progression gives the visible shape a clear beginning and finish. Chestnut Straight Space Buns With Shoulder Outline provides the specific example here: among the school hairstyles examples, this one is most useful for comparing placement and the amount of visible definition. Viewed as a school hairstyles reference, Chestnut Straight Space Buns With Shoulder Outline is most informative around the center part. Chestnut Straight Space Buns With Shoulder Outline provides the specific example here: the sleek finish and straight texture explain why the finished silhouette reads this way and which details would need deliberate styling at home.
Wearability note: Chestnut Straight Space Buns With Shoulder Outline provides the specific example here: check the visible shape from the photographed angle and agree on how firmly the straight texture should be set. For Chestnut Straight Space Buns With Shoulder Outline, this observation applies to the photographed bun.
How to choose a school hairstyle
Start with the day, not the trend. A classroom-only day can handle a softer half-up style, while PE, recess, sports, or windy weather usually needs braids, bubble ponytails, or buns. The style should also be gentle around the hairline because kids and teens wear it for many hours.
The safest formula is simple: detangle first, secure with soft elastics, add accessories after the hold is already in place, and avoid heavy products. That keeps the hairstyle neat without making the hair crunchy or uncomfortable.
Best school hairstyles for active days
For PE, recess, sports practice, or windy walks to school, choose styles with more than one hold point. Double braids, bubble pigtails, braided ponytails, and pull-through braids keep the length controlled without relying on one tight elastic.
If the hair is thick or long, split it into two sections instead of forcing everything into one heavy ponytail. That spreads the weight more evenly and usually feels better by the end of the day.
Best school hairstyles for short hair
Short school hair usually works best with mini buns, small side braids, half-up sections, clips, or soft elastics that control the front without needing all the hair to reach one ponytail. The goal is to keep the face clear while letting the shorter layers sit naturally.
Avoid forcing short pieces into tight styles. A small amount of smoothing cream, a comfortable clip, or two tiny buns often looks neater and feels better than a pulled-back style that keeps slipping.
Best school hairstyles that do not pull at the hairline
Low bubble ponytails, loose side braids, low pigtails, and soft half-up styles are usually gentler than high ponytails or tight buns. They keep the hair controlled without putting the strongest tension around the temples.
For younger kids, comfort matters more than a perfectly polished finish. If a style feels tight when the child turns their head, sits down, or puts on a backpack, loosen it before the school day starts.
What products are actually useful for school hair?
Most school hairstyles do not need a long product routine. A detangling spray, leave-in conditioner, snag-free elastics, a smoothing brush, and a light hold product cover most looks on this page. Braids may need small elastics, buns may need pins, and accessory styles may need lightweight bows or clips.
Affiliate links on this page point to broad Amazon searches for the product type, not a claim that one specific product is required. Pick the option that fits the hair type, age, sensitivity, and budget.

About the author
Bella Ross
Bella Ross is the hairstyle editor behind Latest Easy Hairstyles. She curates practical haircut, braid, color, and styling ideas with a focus on looks that are easy to browse, realistic to recreate, and useful for everyday hair decisions.